Call Us Toll Free: 1-800-827-8953
Close
(0)
You have no items in your shopping cart.
Search
Filters
RSS

Blog posts tagged with 'party rental'

Now in Stock: Vineland Brown Cross Back Chairs

We chose a different finish for this version of cross back chair. Our new Vineland Brown Cross Back Chairs are a rich brown that are hand scraped; reminiscent of the vineyards of Southern Ontario.

Constructed of elm wood, all three wood cross back chairs are available for purchase with or without a cushion depending on the look you desire. Our volume discounts are set up for rental companies, with unit prices rapidly going down past 50 chairs purchased. They are now in stock at our Mississauga warehouse.

Vineland Brown Wood Cross Back Chairs

Additional details about the chairs are as follows:

  • Constructed of Elm wood
  • Commercial Quality
  • Non-marring floor glides
  • Available with or without a natural cushion
  • Stackable up to 8 chairs high
  • Solid wood seat
  • Curved back that molds to the body
  • Weight: 10lbs
  • Dimensions: chair from bottom of legs to top of chair back: 35.5” high, seat is: 16.25” deep x 17.5”wide

If you're interested in a quote for our Vineland Brown Wood Cross Back Chairs including shipping:


Comments (1)
Introducing Lids for our Medium and Large Catering Glassware Boxes

We originally brought in Medium and Large Catering Glassware Boxes to fit a wide variety of our glass and crystal stemware (as well as other brands of glass and crystal stemware). When we first started stocking these products, we were told that most party rental companies chose to saran wrap their boxes instead of relying on a lid. This made sense to us as the use of plastic wrap would ensure dust and bugs couldn’t enter the box when the glassware was being stored.

That being said we’ve been getting asked more and more for lids for our catering glassware boxes. Because of that I’m happy to announce we now have lids available in stock.

Lid for Medium Catering Glassware Box

Medium Catering Box with Lid

  • Made of durable polypropylene plastic corrugated material
  • Available in black
  • Ships flat – some assembly required.
  • Fits a box with the measurements 15 7/8” W x 23 7/8” L x 7 ½” H

Lid for Large Catering Glassware Box

Large Catering Box with Lid

  • Made of durable polypropylene plastic corrugated material
  • Available in black
  • Ships flat – some assembly required
  • Fits a box with the measurements 16 3/8" W x 24 3/4" L x 9 1/4" H

If you’re interested in a quote for any of our catering storage boxes for glassware or the associated lids:


Comments (0)
How to Assemble a Large Catering Box for Glassware

You will notice before purchasing our Large Catering Box for Glassware that this product does require some assembly. These instructions will walk you through the assembly of the Large Catering Box including what parts you should receive and what tools are and are not required. Below is what the Large Catering Box will look like when you first receive it.

Catering Boxes Parts

What is included:

  • (1x) Main Box
  • (5x) Horizontal Inserts
  • (3x) Vertical Inserts

Tools required:

  • Just your hands

Step 1: Taking (1x) Vertical Insert and (1x) Horizontal Insert and put left slit of the horizontal insert into the top vertical insert slit.

Catering Box Assembling Inserts

Step 2: Push down fully until the top of the horizontal insert is level with the vertical insert.

Catering Box Assembling Inserts 2

Step 3: Pick up the second vertical insert and push it into the middle slit of the horizontal insert.

Catering Box Assembling Inserts 3

Step 4: Pick up the third vertical insert and push it into the last slit on the horizontal insert.

Catering Box Assembling Inserts 4Catering Box Assembling Inserts 5

Step 5: Pick up the remaining horizontal inserts and push them into the remaining 4 slits on the vertical inserts. Your inserts are now complete.

Catering Box Inserts Assembled

Step 6: Put the inserts aside and lay the box out on a table and fold all the pre-scored sections to make them easier to position.

Bending SeamsBending Seams 2Bending Seams 3

Step 7: Fold the two sides of the box vertical and then fold their end flaps perpendicular towards one another.

Assembling End

Step 8: Fold the end side up and over the side end flaps, securing in the two notches at the bottom of the box.

Assembling End 2Assembling End 3

Step 9: Repeat steps 7 and 8 on the other end of the box. Your box is almost complete.

Catering Box Assembled

Step 10: The final step is to put the completed insert into the box.

Catering Box Inserting InsertsCatering Box Inserting Inserts 2

You’re all done. You can now use your catering box to transport and store your glassware.

If you are missing parts, are having problems with assembly or have another question, please contact our customer service representatives at sales@nationaleventsupply.com or 1-800-827-8953.

Comments (0)
How to Assemble a Round Folding Table Cart

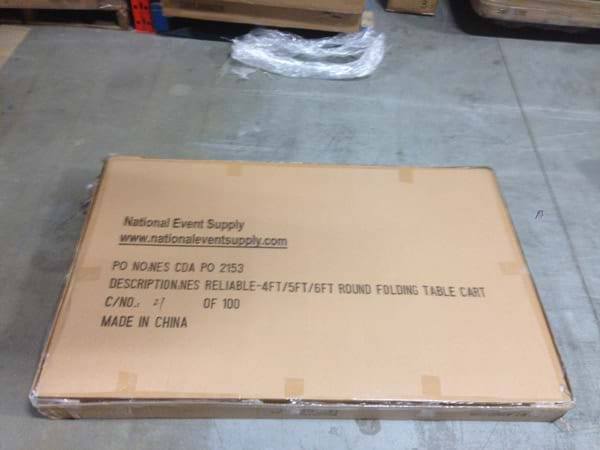
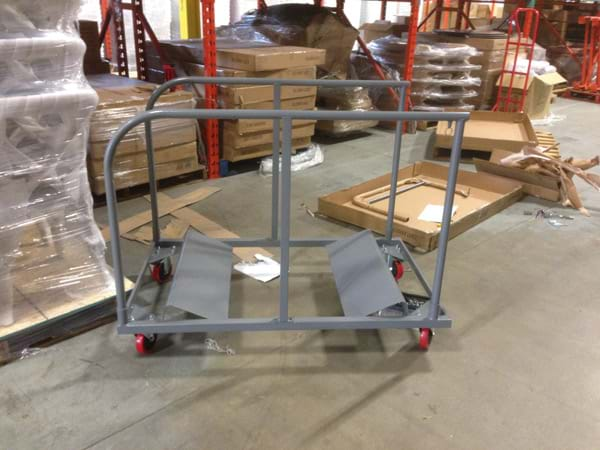
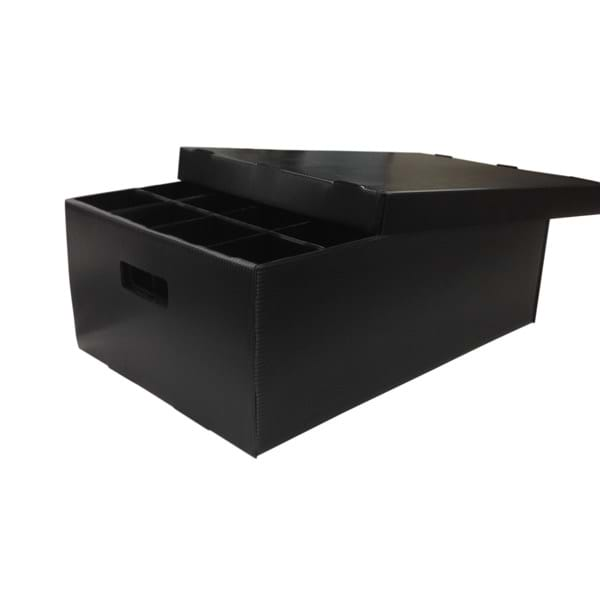
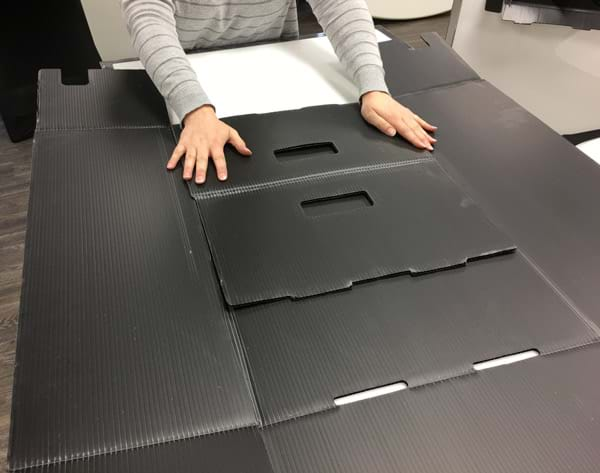
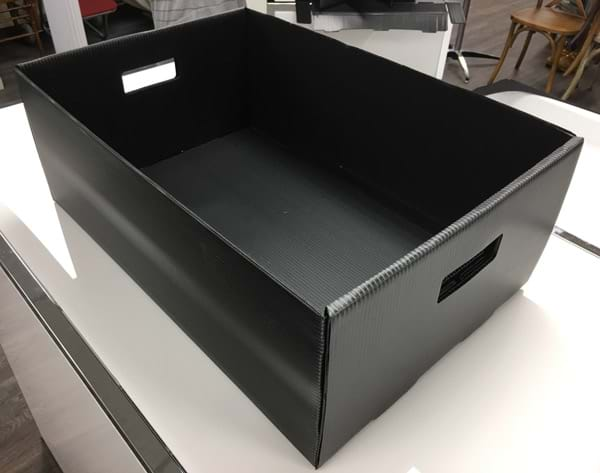
You will notice before purchasing our NES Round Table Cart that this product does require some assembly. These instructions will walk you through the assembly of the cart itself including what parts you should receive and what tools are and are not required. Below is what the Round Table Cart will look like when you first receive it.

Round Table Cart in Box

What you should receive:

  • (1x) Base Cart
  • (4x) Swivel Wheel with brake
  • (2x) Enclosure Pole
  • (1x) Handle
  • (16x) 1 1/4” Bolt
  • (16x) Steel Nut
  • (32x) Steel Washer
  • (12x) 2” Bolt
  • (12x) Gray Nut
  • (1x) Belt

Tools Required (not included):

  • Utility Knife or Scissors
  • Socket Ratchet
  • ½ inch 6 point socket
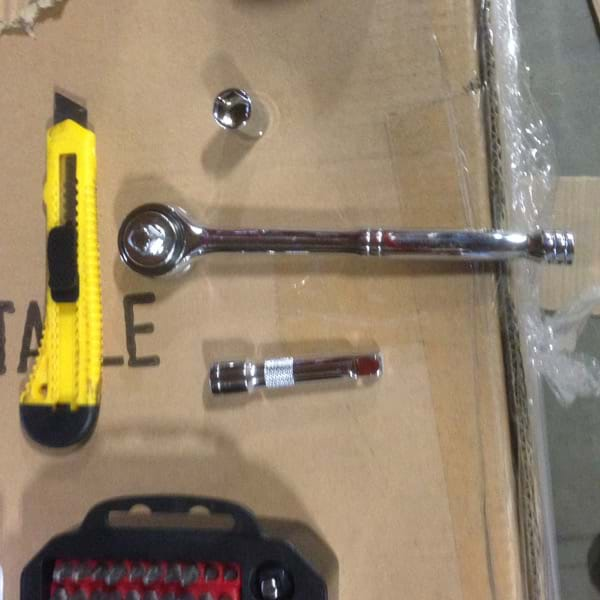
Round Table Cart Tools

  • 3” extension
  • Hex key (included)
  • Wrench (included)

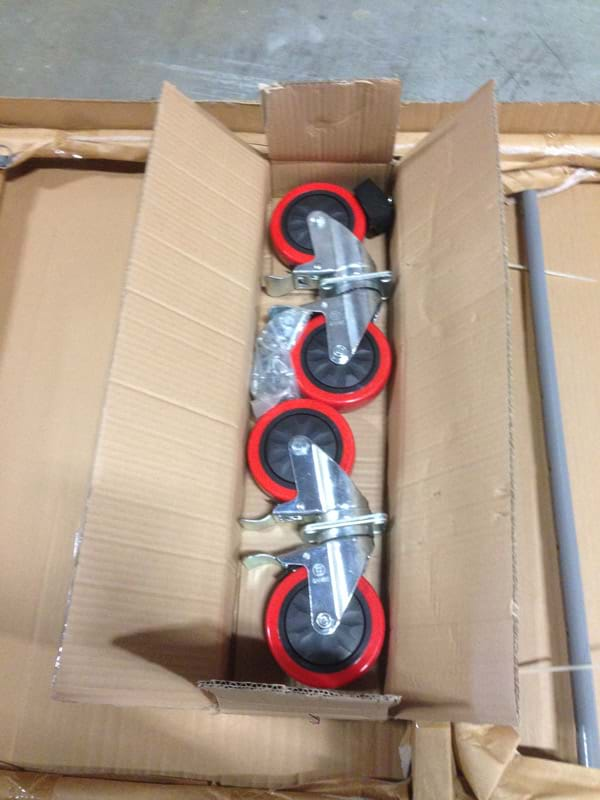
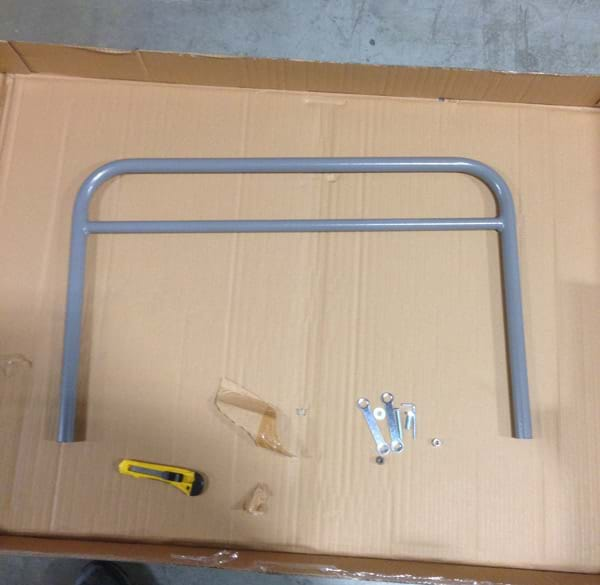
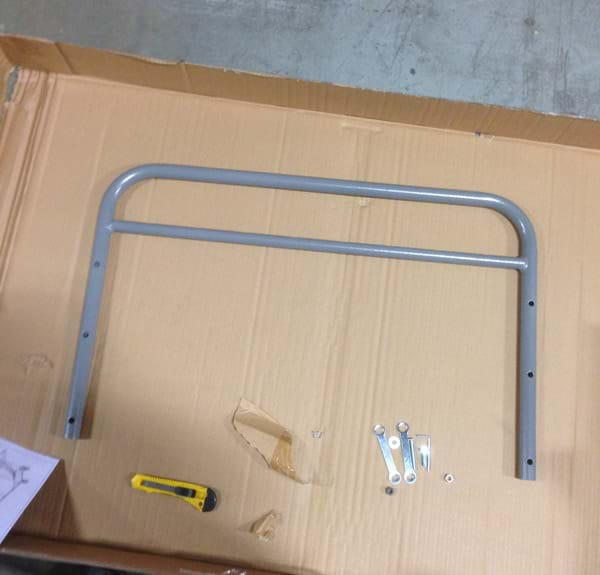
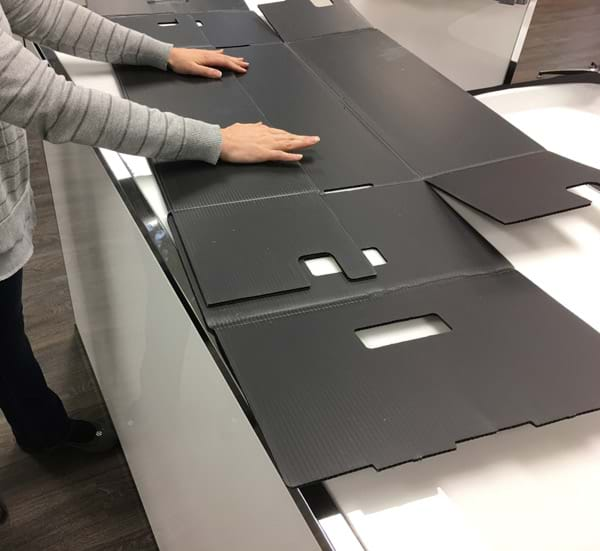
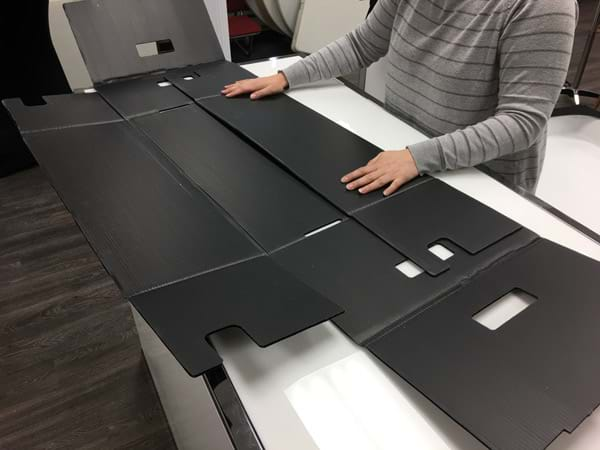
Here’s what it will look like upon opening the box up and removing the base:

Round Table Cart in Box

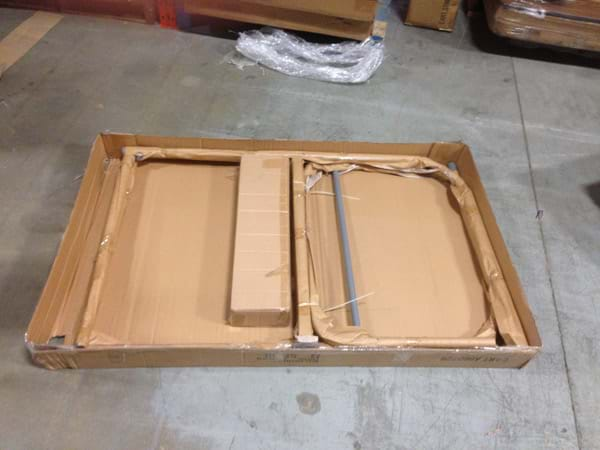
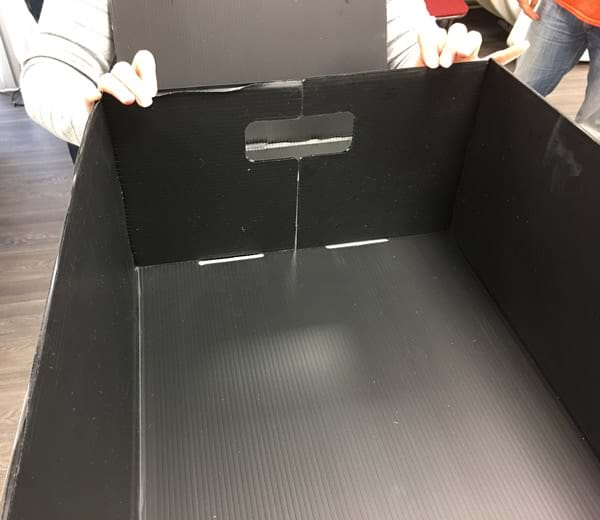
Stand the Cart base up on its side in order to make it easier to put the wheels on.

Round Table Cart Base Standing Up

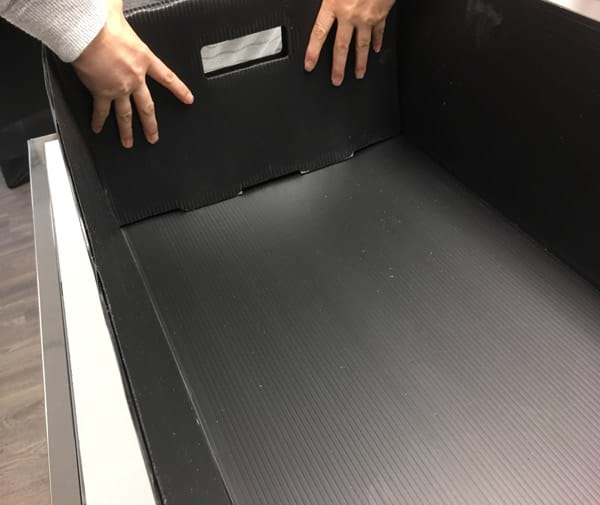
There is a rectangular box in the middle of the box – this contains the wheels, hardware and belt.

Round Table Cart Wheels

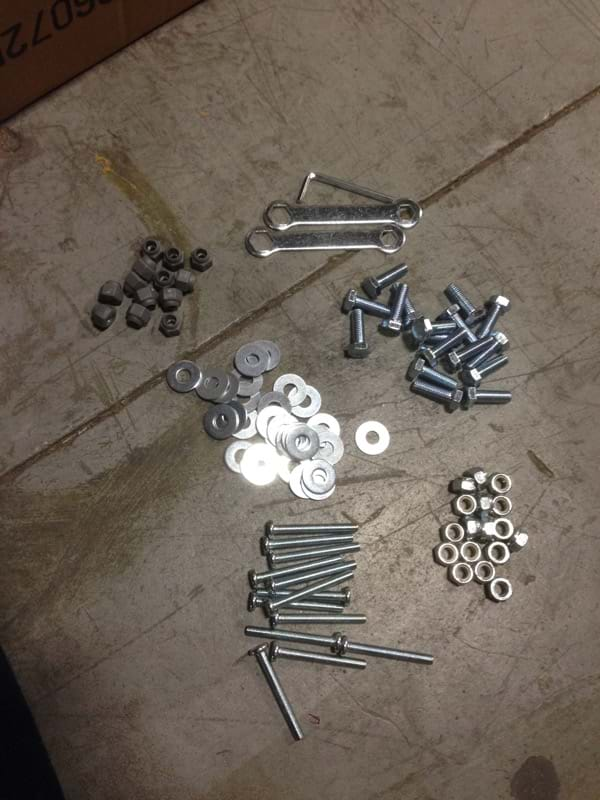
Step 1: Cut open the rectangular box with the utlility knife and take out the bag of hardware. Make sure to double check you have the full number of bolts, washers and nuts as well as the proper tools. If you do not, please contact National Event Supply customer service at 1-800-827-8953 or sales@nationaleventsupply.com.

Round Table Cart Hardware

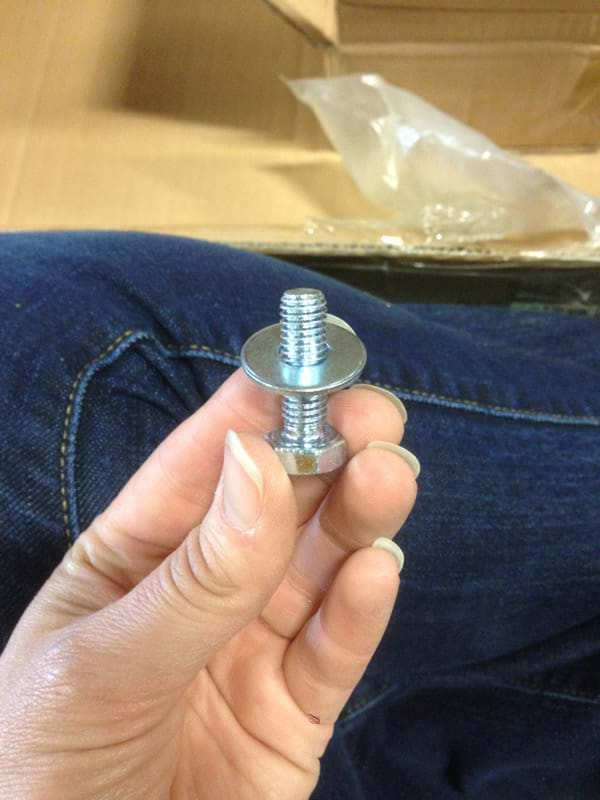
Step 2: Take 1 wheel out of the box, and put 1 washer onto 1x 1 ¼” bolt. Repeat with 3 more 1 ¼” bolts for a total of 4 bolts with 1 washer on each.

Round Table Carts Bolt and Washer

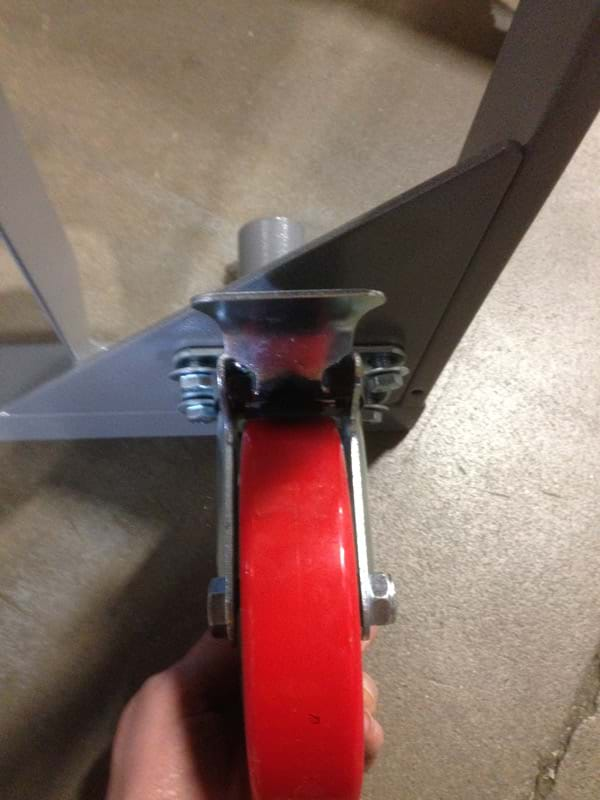
Step 3: Put each bolt and washer set into each hole of one wheel – then put wheel with bolts / washers through the holes at one of the four corners on the bottom of the cart base (the flat side). It does not matter where each wheel goes.

Round Table Cart Attaching Wheel

Step 4: On the top of cart, attach a washer and then steel nut. Tighten with your hand until you can’t anymore.

Round Table Cart Attaching Bolt

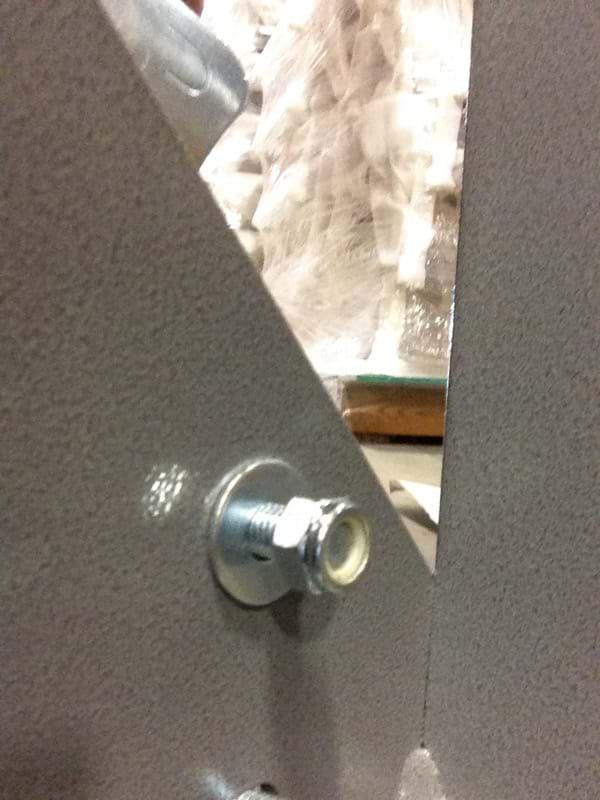
Step 5: Repeat step 4 with the remaining 3 bolts to hold the wheel loosely on the base of the cart.

Round Table Carts 4 Bolts Attached

Step 6: With the wrench provided and your ratchet with ½ inch socket plus 3” extension fastened together, attach the wrench to the bolt head and the ratchet to the steel nut. Ratchet all 4 nuts until the wheel is tight to the base of the cart.


Round Table Cart Bolts Tightened

Step 7: Repeat steps 2 – 6 on the remaining 3 wheels.

Round Table Cart All Wheels Attached

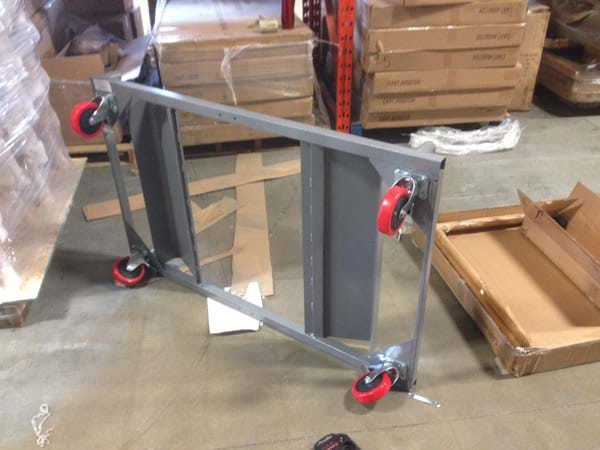
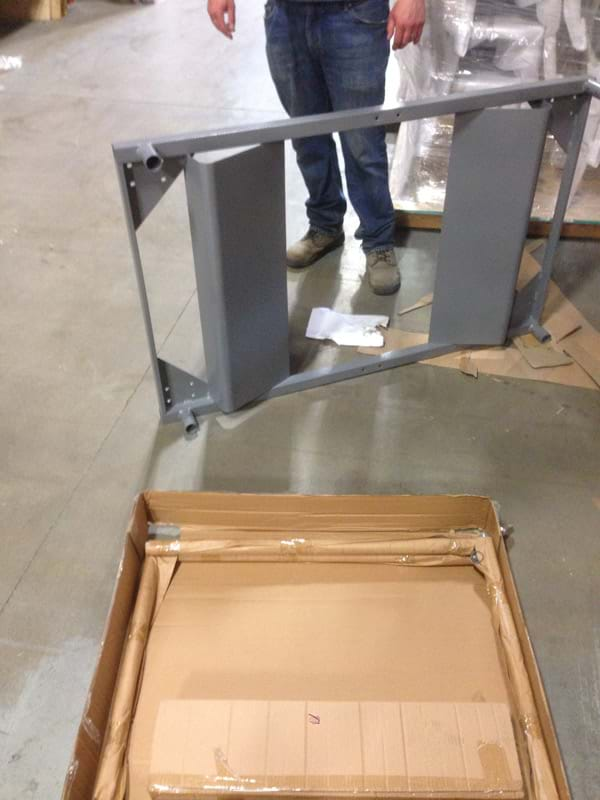
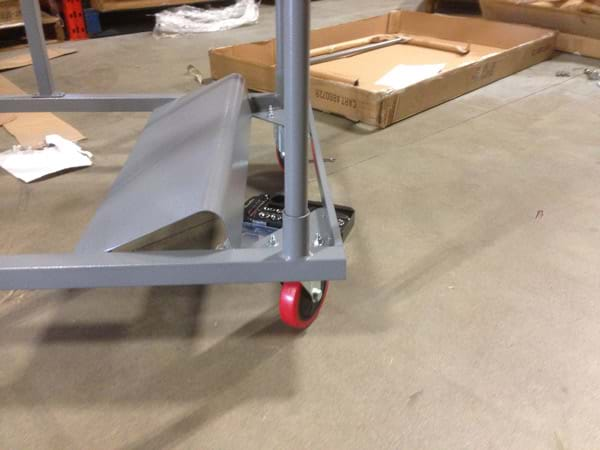
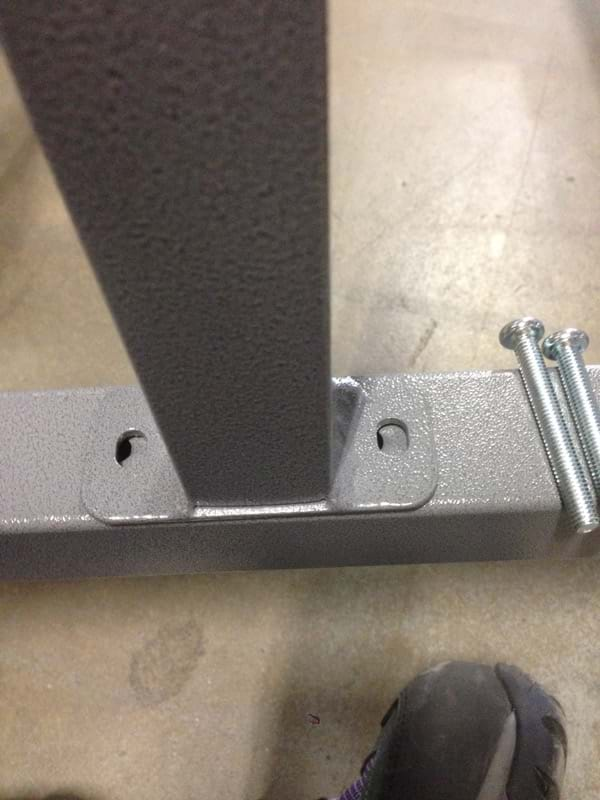
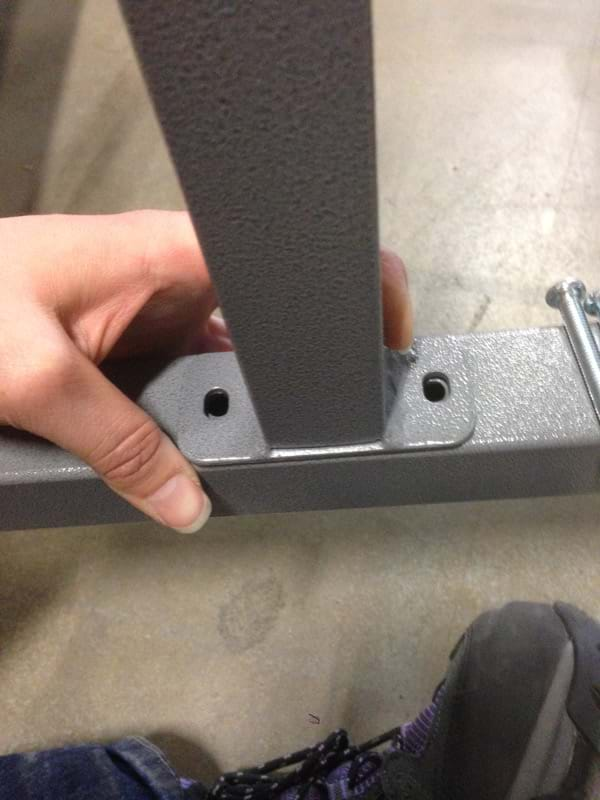
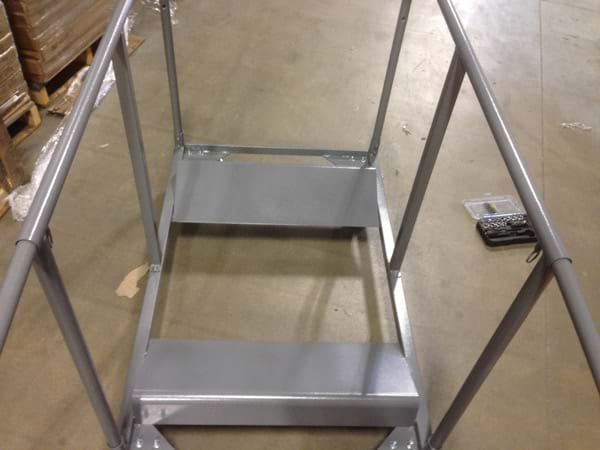
Step 8: Put the cart on its wheels and put the two enclosure poles in each of the holes.

Round Table Carts Putting The Handles on Cart

Be careful to double check that you are putting the pole with the flat bar at the cart end that has a 2” space before the end of cart. The below 2 pictures show the difference in ends – one has a gap and one does not.

Round Table Carts Attaching Poles 1Round Table Cart Attaching Poles 2

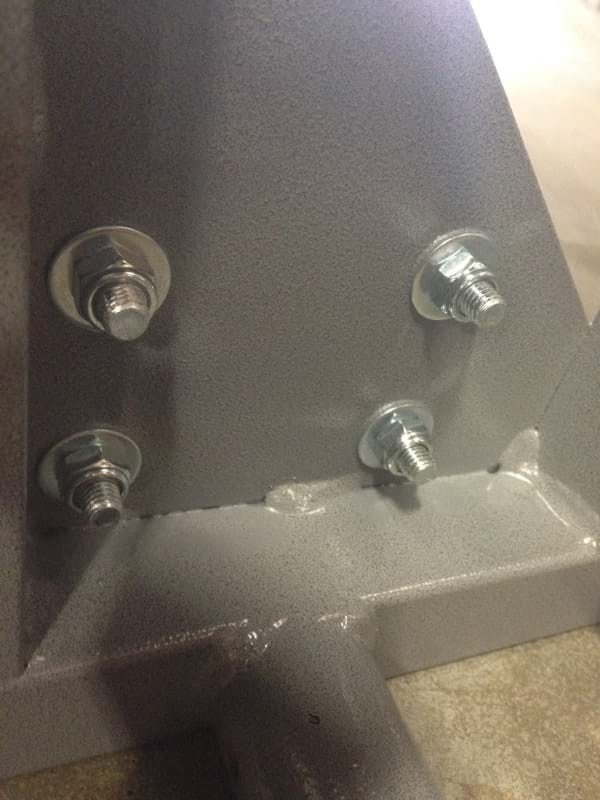
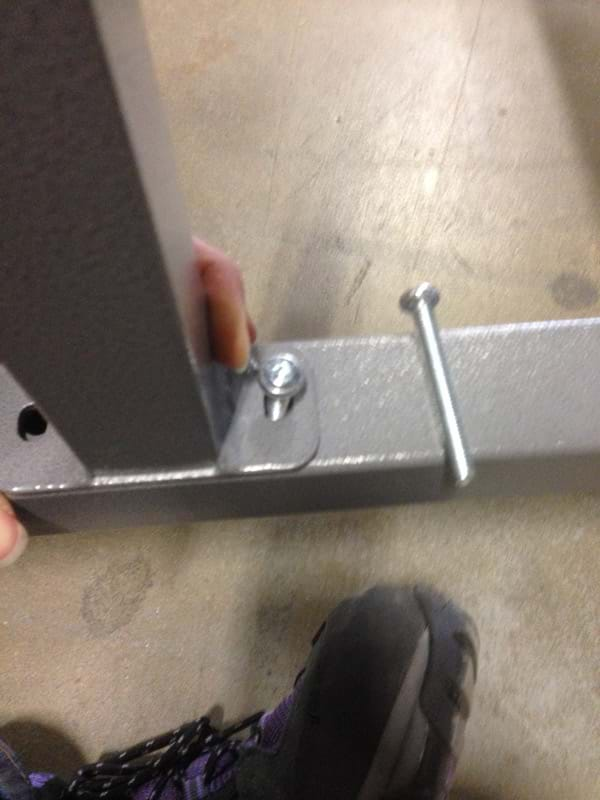
Step 9: Pick up 1x 2” bolts and 1x grey nuts. Starting on one pole, push down and put the bolt through the top hole – with the bolt head facing towards the side of the cart. Screw the grey nut on.

Round Table Cart Attaching Handles

Step 10: Take the hex key and put it into the bolt head and hold it with one hand. Using your other hand, screw on the nut. Repeat step 9 and 10 on the remaining 3 corner sections where the pole meets the cart.

Round Table Carts Tightening Screws on handle


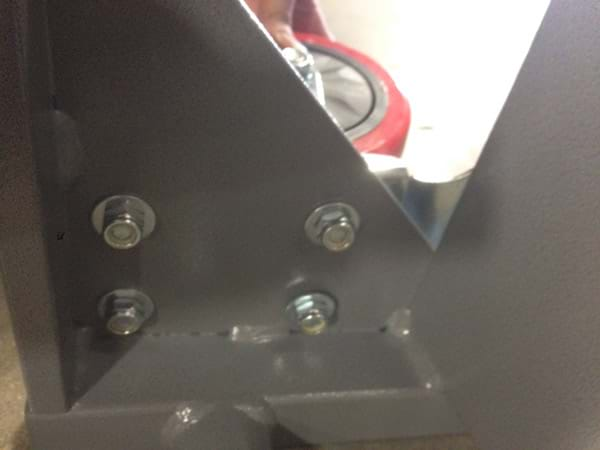
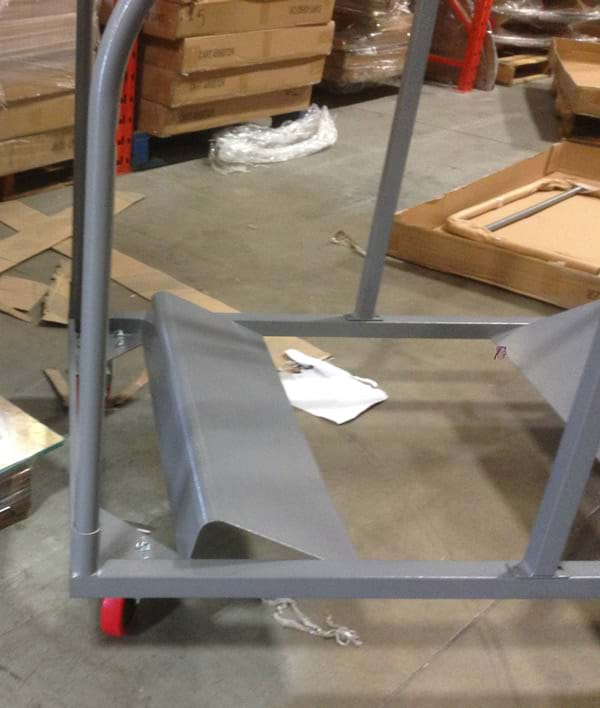
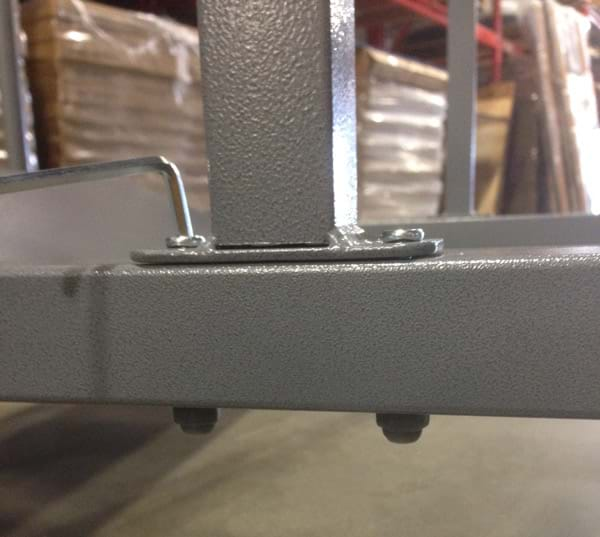
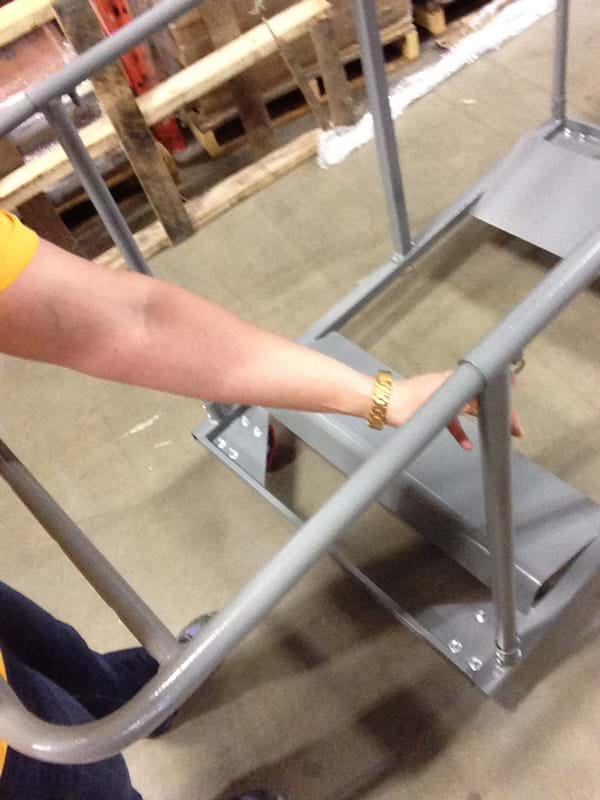
Step 11: Now we need to connect the middle poles (circled in the photo below) on either side of the cart to the base of the cart.

Round Table Cart Middle Pole

You will need 2 x 2” bolt and 2x grey bolts. The bolt holes may not initially line up but you just need to maneouver the middle bar into place and put the 2 bolts in (with the bolt head facing you).

Round Table Cart Securing Middle Pole

Round Table Cart Securing Middle Pole 2

Round Table Carts Securing the Middle Pole 3

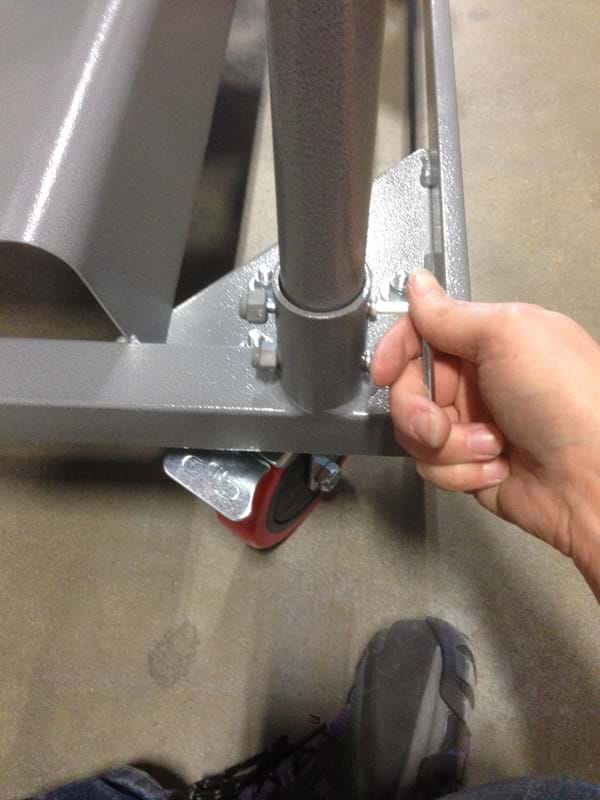
Step 12: Using your hex key again, put it into the bolt head and use one hand to hold the hex key while you use the other hand to screw the grey bolt onto the bottom of the bolt. Repeat on both bolts until nut is tight. Repeat step 12 on the other middle pole.

Round Table Cart Tightening Middle Pole

Step 13: You will see 1 remaining part left – the handle of the cart. There’s a side that has holes and a side that does not (see below pictures).

Round Table Cart Handle

Round Table Cart Handle 2

Place the handle (hole side down) in the 2 holes at the top part of the straight enclosure poles.

Round Table Cart Attaching Handle

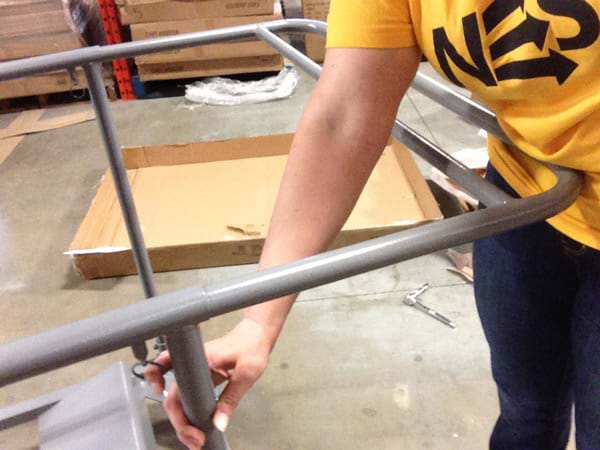
Step 14: There are two locking pins on either side of the handle that allow you to adjust the space depending on if you’re storing 4ft, ft or 6ft round tables. Using your hand pull down on the locking clip and use your body to push one side of the handle in.

Round Table Cart Pulling Handle Out

Do the same on the other side – pulling down on the locking pin and using yoiur body to push the handle in.

Round Table Cart Attaching Handle 2

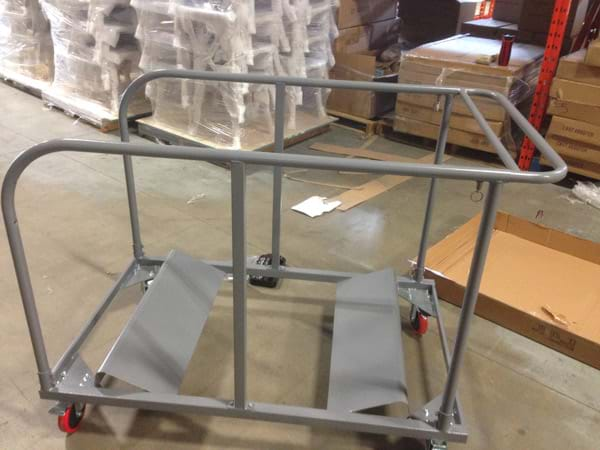
Your cart is almost complete! The below three photos show the handle position when storing a 4ft round;
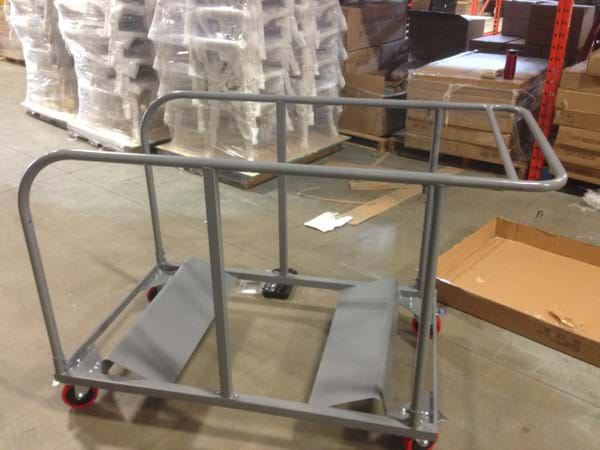
Round Table Carts 4-ft Tables

5 foot round;

Round Table Carts 5-ft

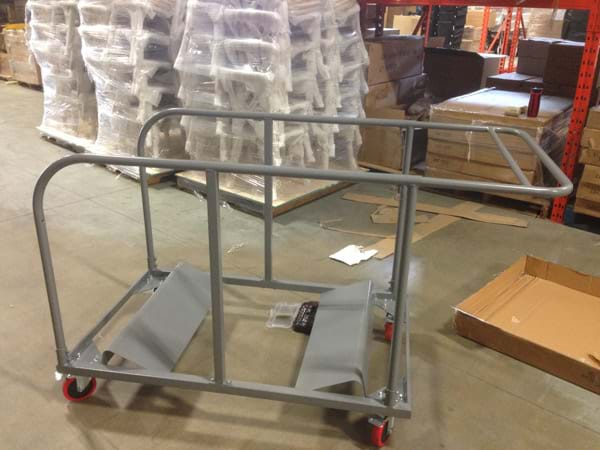
And 6ft round tables.

Round Table Carts 6-ft

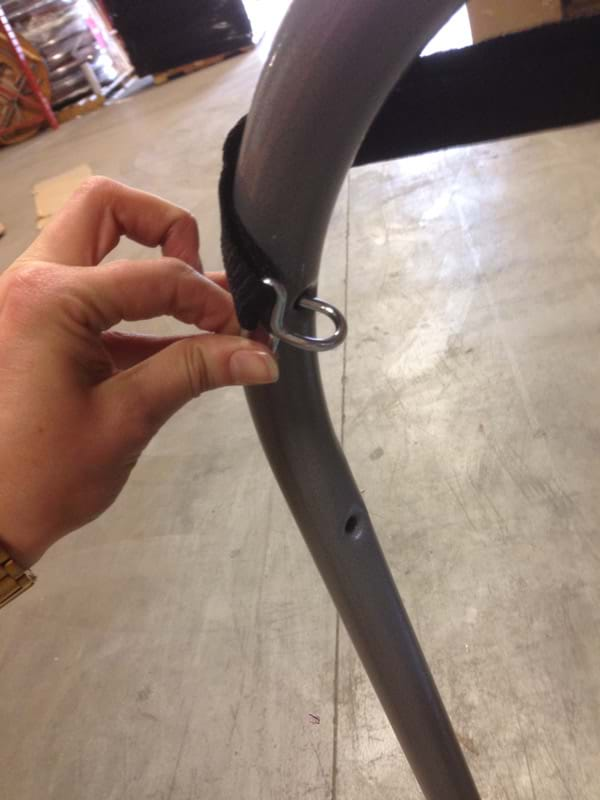
Step 15: The last thing to do is to attach the belt that is used whenever you’re transporting less than a full cart load of tables. This belt can be hooked in one of the many holes on the cart enclosure poles and handle to make sure the tables don’t flow all over in the cart. The belt can also be extended to make a tighter or looser fit.

Round Table Cart Strap

Round Table Cart Strap 2

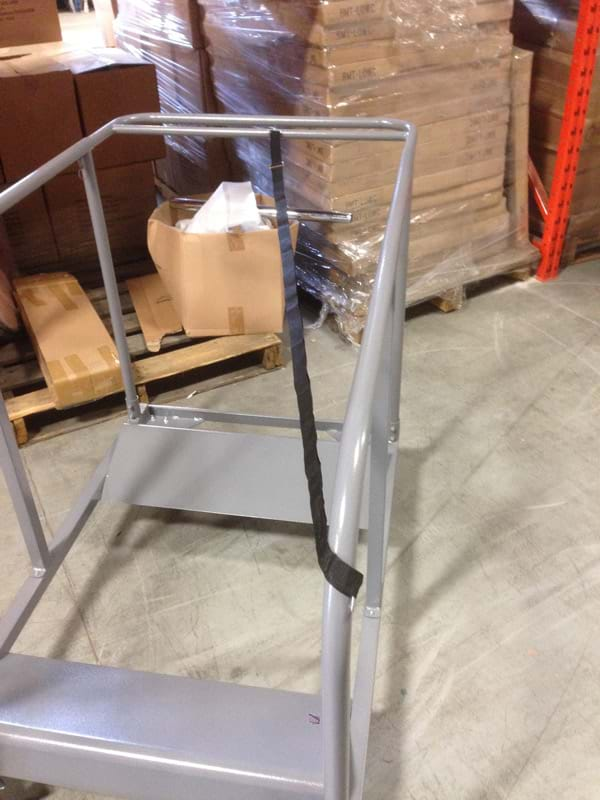
There you go. All set to transport your round folding tables.

If you are missing parts, are having problems with assembly or have another question, please contact our customer service representatives at sales@nationaleventsupply.com or 1-800-827-8953.

Comments (0)
What Colour is the Core of a Resin Chiavari Chair?

Chiavari Chair Core Colors

Source: Style Me Pretty Photographer: Clane Gessel Photography

Resin Chiavari Chairs are becoming more and more prevalent in the special event marketplace. It is easy to know what a wood Chiavari chair or metal Chiavari chair looks like under the paint – as wood and metal are popular household items. What does a resin Chiavari chair look like under the paint?

The answer is more complicated than one might think as suppliers and their customers drive pricing of resin Chiavari chairs down.

As far as we know there is two answers to what colour the core of a resin Chiavari chair is. A resin Chiavari chair can have a white core or a similar colour core as its exterior colour (i.e. a gold Chiavari would have a matte gold core).

White is the cheapest colour as it is the closest colour to the raw resin colour. This tends to mean a cheaper overall resin Chiavari chair price. It can also mean a shorter rental life or shorter usage of the chair – because with rental companies in particular, scratches to the chair would be way more noticeable with a white core then with a similar colour core.

A resin Chiavari with a similar colour core will have a slightly higher cost over a white core chair. It will also mean a longer rental life (and longer rental life equals more revenue per chair).

Have more questions about Chiavari Chairs in general? Check out The Definitive Party Rental Guide to Chiavari Chairs.

Comments (0)